Sider

Viser innlegg med etiketten Baking. Vis alle innlegg

25. april 2024

Easy Same-Day Focaccia - so good

Denne oppskriften er fra Lace Bakes og den er helt fantastisk. Selvom det kan virke som det er mye jobb, så er det ikke det. Bildene er også fra Lace Bakes, til jeg får tatt egne bilder.
På slutten av denne oppskriften er det en del tips og nyttig informasjon, som ikke er en del av oppskriften 😊

Denne oppskriften er til en passe stor panne, avlang ca 22cm x 33cm (12 servings)
♥ 420 ml lunket vann, litt varmere enn kroppstemperaturen
♥ 6 gram (1 1/2 teskje ) tørr gjær
♥ 500 gram 00 mel
♥ 5 gram (1 teskje) honning
♥ 15 ml (1 spiseskje) ekstra virgin olivenolje
♥ 10 gram (2 teskjer) salt


Mixing, Stretch + Folds and First Proofing

Step 1
In a large mixing bowl, whisk together the warm water, instant yeast, honey, extra virgin olive oil and fine sea salt until evenly combined. Tip your bread flour into the bowl with the rest of the ingredients and mix with a spoon until all dry flour patches have disappeared. Place cloth or reusable cover over top of bowl, let rest for 15 minutes at room temperature.

Step 2
After 15 minutes, you will perform a stretch + fold. This helps to develop the gluten in the dough which will help with the structure of the bread. Wet your hand (this prevents dough from sticking to you), grab a handful of dough from the 12 o’clock position, pull it up slightly and then pull it all the way up and over the bulk of the dough to the 6 o’clock position. Repeat this action on all sides of the dough until it feels like you’ve created tension and you can’t stretch the dough up and over anymore…it should have tightened up into a rough ball. Let rest for 15 minutes and then repeat the stretch + fold action one more time.

Step 3
After the second set of stretch and folds, wet your hands, gather your dough and place it seam side down into bowl so the top is quite smooth (this helps prevent air bubbles from escaping).

Step 4
Cover the bowl and leave the dough to continue to proof in the bowl for 1.5 hours at room temperature.
Preparing Tray + Second Proofing

Step 5
Prepare your 9” x 13” (22cm x 33cm) baking tray. Put a tiny bit of oil on the tray, rub it all around and then place a sheet of nonstick parchment paper on top and press down. The oil helps the parchment to stick in place. Then drizzle about 2-3 tablespoons of olive oil on the parchment paper and spread it evenly around the base and sides of the paper lining the tray/pan. The nonstick parchment prevents the focaccia from sticking to the tray when baking.

Step 6
Using a curved dough scraper, gently release the dough from the sides of the bowl and tip the dough into your oiled and lined tray.

Step 7
Now, you are going to oil your hands and fold one side of dough towards the middle of the blob of dough. Repeat with the other side, a bit like folding a piece of paper into thirds (it will look a bit like a burrito). Then flip the dough so the seams from the folding are at the bottom and the smooth side is at the top.

Step 8
Cover using another tray, inverted - this prevents the dough from drying out and forming a crust while it rises. If you don’t have another tray, a plastic storage box can work too. Do not cover the dough with plastic wrap or a tea towel, it will stick.

Step 9
Let sit to proof at room temperature for about 1.5 hours. The dough should be mostly filling the space in the tray at this point. If it’s not filling the space after this period of time, oil your hands and from the underside of the dough you gently pull it towards the edges of the tray. The timing will depend on the temperature on the day. If it’s a very hot day it might only take 1.25 hours to puff up/spread in tray. On a very cold day it could take 2 hours.
Dimpling, Topping + Baking Your Focaccia

Step 10
Once you think the dough has finished proofing (it will be floofy and jiggly when you shake the tray), it’s time to preheat your oven to 220C/430F.

Step 11
Drizzle the top of the dough with a little more extra virgin olive oil and then oil your hands. Using both hands, press your fingers into the dough, gently touching the bottom of the tray. Repeat until the entire tray of dough is dimpled. There is such a thing as too much dimpling though…you can lose some of the nice bubbles you’ve created in the dough if you dimple too much. Just be mindful of air pockets and try not to pop them…these bubbles are what make the crumb of a focaccia so interesting and delicious.

Step 12
Top with a sprinkle of flaky sea salt. Add anything you’d like to the top by gently pressing toppings into the little dimples: olives, rosemary (coat in a bit of oil so it doesn’t burn), cherry tomatoes, onions, jalapeños + cheese. Before dimpling, you could top with basil pesto or with my chimichurri sauce if using oily toppings like these, then omit the drizzle of olive oil.

Step 13
I always bake my focaccia for about 18-22 minutes in a 220C/430F oven. I bake it on the lowest rack in the oven because I think it helps to crisp the bottom of focaccia and prevent the top from burning. If you have a pizza setting in your oven, use that; the main heat source will come from the bottom, which I think is ideal for baking focaccia. Check the focaccia after 18-20 minutes and remove from oven when it’s reached a deep golden brown colour. I've learned that every oven is so different so don't worry about overbaking it if it takes closer to 25-30 minutes in your oven. The interior will still remain soft! If this is the case and it takes on the longer side, even up to 35 mins, I’d recommend upping your oven temp for the next time (turn up by 10-20 degrees), it could just be your oven runs a little on the cooler side.

Step 14
Let it cool for a couple of minutes in the pan and then transfer it to a cooling rack so the bottom doesn’t steam while sitting in the tray. You'll want it to stay nice and crispy at the bottom.

Step 15
You can top with more olive oil when it’s come out of the oven if you wish for it to look burnished and glistening. If I’ve topped the focaccia with pesto or chimichurri I don’t tend to do this. With other toppings I do a little drizzle and it soaks right into the crust when it’s hot out of the oven.

Step 16
Let cool for at least 15-20 minutes before cutting in!

NOTES ON FREEZING FOCACCIA

Step 17
It’s best enjoyed fresh the same day, but if you’d like to save some for the next day, wrap it in foil to store and then pop into oven (still in foil) and bake at 180C/355F for about 10-15 minutes. It will bring it back to life. It can also be wrapped in foil and frozen. Bake in foil straight from frozen at 200C/395F for about 15 minutes. Peel back the foil to expose the top of the focaccia and bake for an additional 2-3 minutes to crisp up the top.

NOTES ON FLOUR

Step 18
TYPE OF FLOUR: You will get the best results using white bread flour with 12% protein content or higher. So for every 100g of flour, there are 12 or more grams of protein listed in the nutritional count. To calculate this, take note of the serving size on your pack of flour - it's normally 30g. Then check the grams of protein per serving and multiply this by whatever number you need to for the serving size to be 100g. So if there are 4g protein per/30g flour, then multiply 4g x 3.33 to see how much protein there is in 100g. In this case it would be 13.32g of protein per 100g.

Step 19
WHY DO I NEED HIGH PROTEIN FLOUR? My favourite flour for focaccia is Canadian/Manitoba bread flour which is 15% protein, but normal bread flour is also fine! The focaccia can hold its air bubbles inside more efficiently when you use flour with a higher protein content. This is because more protein generally means stronger gluten, and gluten is what gives your bread structure.

Step 20
I realise that bread flour is not readily available in some countries. I hope that focusing on the protein content helps you narrow down your choices. If you can only find plain/all purpose flour with a protein content of 9-10%, I’d recommend reducing the water in the dough by 30g -40g. Using flour with a lower protein content will mean your focaccia will probably not have many big air bubbles. I would not recommend using whole grain/whole wheat flours in focaccia. The fibre content of these flours mean your focaccia will probably be dense, not fluffy. If you really want to incorporate whole grain flours, start by only adding in 50% whole grain flour. Be aware that you may need to up the water content when using wholegrain flour and make sure you manage your expectations for the amount of bubbles you'll achieve!

NOTES ON EQUIPMENT

Step 21
WHAT EQUIPMENT DO I NEED? - digital kitchen scale
- large mixing bowl
- 9”x13” (23cm x 33cm) baking pan or tray
- curved dough scraper (you can do without this but it helps you to easily remove the focaccia dough from the bowl when it’s time to transfer it to pan) -nonstick parchment/baking paper

Step 22
CAN I MEASURE WITH CUPS? If you intend to bake bread, you will need to invest in a digital kitchen scale in order to ensure precise measurements. Measuring flour/water in cups leaves too much room for user error. Digital scales ensure that you're following the recipe properly.

NOTES ON YEAST

Step 23
Make sure your yeast is in date, and if it's a big container of yeast, be sure it was opened recently (within last 3/4 months). Yeast loses its oomph over time.

Step 24
I find that instant yeast is easiest because you don’t need to let the yeast bloom/activate before mixing the dough and you can mix everything together all at once. If you are using active dry yeast, use 1/2 teaspoon/2g extra and mix with warm water and honey. Let sit for 5-10 minutes to bloom before adding in the other ingredients. If you are using fresh yeast, use 18g. Dissolve with the the warm water and honey and let bloom for 5-10 minutes before adding in other ingredients.


Tusen takk for besøket og ha en strålende dag videre 😊💖

21. februar 2024

Beste focaccia ever - overnight focaccia

Denne oppskriften er fra Lace Bakes og den er helt fantastisk. Selvom det kan virke som det er mye jobb, så er det ikke det. Bildene er også fra Lace Bakes, til jeg får tatt egne bilder.

Denne oppskriften er til en passe stor panne, avlang ca 22cm x 33cm (12 servings)
♥ 420 ml lunket vann, litt varmere enn kroppstemperaturen
♥ 4 gram (1 teskje ) tørr gjær
♥ 500 gram 00 mel
♥ 5 gram (1 teskje) honning
♥ 15 ml (1 spiseskje) ekstra virgin olivenolje
♥ 10 gram (2 teskjer) salt


Day One - Dough Mixing Day

Step 1
In a large mixing bowl, stir together the slightly warm water, instant yeast, honey, extra virgin olive oil and fine sea salt until evenly combined. Tip your bread flour into the bowl with the rest of the ingredients and mix with a spoon until all dry flour patches have disappeared. Place cloth over top of bowl, let rest for 10 minutes at room temperature.

Step 2
After 10 minutes, you will perform a stretch + fold. This helps to develop the gluten in the dough which will help with the structure of the bread. Wet your hand (this prevents dough from sticking to you), grab a handful of dough from the 12 o’clock position, pull it up slightly and then pull it all the way up and over the bulk of the dough to the 6 o’clock position. Repeat this action on all sides of the dough until it feels like you’ve created a bit tension and you can’t stretch the dough up and over anymore…it should have tightened up into a rough ball. If the dough is wetter/stickier than mine is (in video tutorial I’ve linked) and doesn’t form into a ball, don’t worry too much! It’s just that all bread flours absorb different amounts of water. It should bake up just fine the following day! Let rest for 10 minutes and then repeat the stretch + fold action one more time.

Step 3
After the second set of stretch and folds, wet your hands, gather your dough and place it seam side down into bowl so the top is quite smooth (this helps prevent air bubbles from escaping).

Step 4
Top the dough with a good drizzle of olive oil (1 Tbsp) and rub it over the dough to make sure entire top surface has been covered. Cover your bowl with a reusable shower cap, a lid, plastic wrap, or transfer into a Tupperware container. The dough will rise in the fridge during its rest, so make sure there is room in the bowl for growth. Put in coldest spot of your fridge and let rest in there for 12 - 48 hours.

Day Two - Baking Day

Step 5
Prepare your 9” x 13” (22cm x 33cm) baking tray. Put a tiny bit of oil on the tray, rub it all around and then place a sheet of parchment paper on top and press down. The oil helps the parchment to stick in place. Then drizzle about 2-3 tablespoons of olive oil on the parchment paper and spread it evenly around the base and sides of the paper lining the tray/pan. The parchment prevents the focaccia from sticking to the tray when baking.

Step 6
Remove your dough from fridge and using a curved dough scraper, gently release the dough from the sides of the bowl and tip the dough into your oiled and lined tray.

Step 7
Now, you are going to oil your hands and fold one side of dough towards the middle of the blob of dough. Repeat with the other side, a bit like folding a piece of paper into thirds. Then flip the dough so the seams from the folding are at the bottom and the smooth side is at the top.

Step 8
Cover using another tray, inverted - this prevents the dough from drying out and forming a crust while it rises. If you don’t have another tray, a plastic storage box can work too. Do not cover the dough with plastic wrap or a tea towel, it will stick.

Step 9
Let sit for about 1.5 - 2.5 hours (the dough should be mostly filling the space in the tray). If it’s not filling the space after this period of time, oil your hands and from the underside of the dough you gently pull it towards the edges of the tray. The timing will depend on the temperature on the day. If it’s a very hot day it might only take 1.5 hours to puff up/spread in tray. On a very cold day it could take 2.5 hours.
Dimpling, Topping + Baking Your Focaccia

Step 10
Once you think the dough is ready (it will be floofy and jiggly when you shake the tray), it’s time to preheat your oven to 220C/430F.

Step 11
Drizzle the top of the dough with a little more extra virgin olive oil and then oil your hands. Using both hands, press your fingers into the dough, gently touching the bottom of the tray. Repeat until the entire tray of dough is dimpled. There is such a thing as too much dimpling though…you can lose some of the nice bubbles you’ve created in the dough if you dimple too much. Just be mindful of air pockets and try not to pop them…these bubbles are what make the crumb of a focaccia so interesting and delicious.

Step 12
Top with a sprinkle of flaky sea salt. Add anything you’d like to the top by gently pressing toppings into the little dimples: olives, rosemary (coat in a bit of oil so it doesn’t burn), cherry tomatoes, onions, jalapeños + cheese. Before dimpling, you could top with basil pesto or with my chimichurri sauce if using oily toppings like these, then omit the drizzle of olive oil.


Step 13
I always bake my focaccia for about 18-22 minutes in a 220C/430F oven. I bake it on the lowest rack in the oven because I think it helps to crisp the bottom of focaccia and prevent the top from burning. If you have a pizza setting in your oven, use that; the main heat source will come from the bottom, which I think is ideal for baking focaccia. Check the focaccia after 18-20 minutes (it might still need more time!) and remove from oven when it’s reached a deep golden brown colour. I've learned that every oven is so different so don't worry about overbaking it if it takes closer to 25-28 (or more) minutes in your oven. The interior will still remain soft! If this is the case and it takes on the longer side, even up to 35 mins, I’d recommend upping your oven temp for the next time (turn up by 10-20 degrees), it could just be your oven runs a little on the cooler side.

Step 14
I let it cool for a couple of minutes in the pan and then I transfer it to a cooling rack so the bottom doesn’t steam while sitting in the tray. I want it to stay nice and crispy.

Step 15
You can top with more olive oil when it’s come out of the oven if you wish for it to look burnished and glistening. If I’ve topped the focaccia with pesto or chimichurri I don’t tend to do this. With other toppings I do a little drizzle and it soaks right into the crust when it’s hot out of the oven.

Step 16
Let cool for at least 15-20 minutes before cutting in!


Tusen takk for besøket og ha en strålende dag videre 😊💖

10. januar 2022

Beste knekkebrød 😊

Ingredienser:

♥ 3,5 dl sammalt rug
♥ 3,5 lettkokte havregryn
♥ 1 dl havrekli
♥ 1,5 dl sesamfrø     
♥ 2 dl gresskarkjerner
♥ 2 dl solsikkekjerner
♥ 0,5 dl linfrø
♥ 2 ss salt
♥ 7 dl kaldt vann

Fremgangsmåte:
♥ Bland alle ingredienser til en jevn røre.
♥ Tilsett eventuelt mer vann
♥ Stryk røren tynt utover på et bakepapir på et stekebrett
♥ Stek på 150*C i en time
♥ Avkjøl og knekk opp


Tusen takk for besøket og ha en strålende dag videre 😊💖

13. januar 2021

Tjukkaser på takke 😊

Du trenger: 

♥ ca 1 kg hvetemel
♥ 1 liter kefir
♥ 1 dl lys sirup
♥ 3 ts natron
♥ 3 ss sukker

Sirup, sukker og natron blandes ut i litt kefir. Ha i resten av melet og kefirmelken. Ikke la røren bli for løs.

Legg en god spiseskje med røre i mel. Rull deigen i melet. Legg på takke og klapp ut ca 15. stk pr takke. 

Serveres med smør, sukker, brunost eller sirup. Tjukkasene er supre å fryse. Kan varmes i stekeovn eller brødrister. 


Tusen takk for besøket og ha en strålende dag videre 😊


Tynnlefser – med semulegryn 😊

Ingredienser :
♥ 1 l melk
♥ 1 dl semulegryn
♥ 150g smør
♥ 1 ts kardemomme
♥ Ca 750g hvetemel / jeg brukte speltmel          ( det meste skal brukes til utbakingen)

Om du bare skal lage en versjon av lefser ville jeg ha dobbelt oppskriften. Det tar jo litt tid å lage og de forsvinner fort, så da er det godt å lage noen når man først er igang.

Slik gjør du:
Kok opp melk og smør, ha i semulegryn og kok det til en grøt. La dette småkoke i ca 10 min, husk å rør hele tiden, da det klumper og svir seg fort. Avkjøl i ca 4 min, før du har det i en kjøkkenmaskin og tilsetter litt mel. Deigen skal ikke bli for fast, og er bedre å tilsette mer mel til hvert emne når du skal bake de ut. Du kan også gjerne blande deigen i en bolle med sleiv, men husk å sikt melet og pass på at det ikke er klumper fra semulegrynen.

Ha deigen ut på et bord og elt inn passe med mel. Jo mindre mel du bruker, jo saftigere blir lefsene, MEN bruk så mye mel at deigen ikke setter seg fast! Har du i for lite kan lefsa fort revne eller sette seg fast i bordet eller i kjevla. Begynn med å ta godt med mel utover duken (baksiden) eller på bordet. Melet skal blandes inn mens deigen forstatt er varm, bruk gjerne en deig skrape.
Del opp i emner ca 10-13 stk.

Lag deigemnene ferdig, med å forme de runde, da er det lettere å forme de runde etterpå. Ha godt med mel på duken og klapp mel på deigemne, begynn med å trykke den litt flat, snu den og gjør det samme på andre siden. Se video lengre ned.

Deigen er veldig lett og bake med, og lefsene blir veldig møre og saftige med bruk av semulegryn.

Ha takka på middels varme, bruk pinnen og rull lefsa på og over på takka, hver rask på hånda så den ikke deler seg. Da må du kanskje ha i mer mel. Stekes til lefsa får små brune flekker, da snur du den. Et tips kan være å bruke en nylonstrømpe på kjevla for å minske faren for at deigen skal feste seg.


Tusen takk for besøket og ha en strålende dag videre 😊

14. desember 2020

Grove scones 😊

Grove scones er superraske å lage fordi de hever med bakepulver, ikke gjær. Bruk fin eller grov sammalt hvete og server til frokost eller i matpakken.😊

INGREDIENSER
♥ 220 g hvetemel
♥ 220 g sammalt hvete, fin eller grov
♥ 1 ss bakepulver
♥ 1 ts salt
♥ 2 ss sukker
♥ 4 ss rapsolje
♥ 3 dl skummet melk eller lettmelk

Bland sammen mel, bakepulver, salt og sukker. Ha i olje og melk.
Rør sammen deigen, men ikke arbeid den for lenge. Er deigen klissete, tilsett litt mer hvetemel.
Ta deigen ut på et lett melet bakebord. Del den i to og form til to runde ”kaker” (2-3 cm tykke). Legg dem på stekeplate med bakepapir.

Skjær hver ”kake” i fire kakestykker. Skjær nesten gjennom, men behold den runde formen.
Stek sconesene midt i ovnen ved 200 °C i 15–20 minutter. Avkjøl på rist.


Tusen takk for besøket og ha en strålende dag videre :-)

Croissant 🥐

Denne oppskriften har vi funnet hos Ida Gran Jansen, en nydelig oppskrift på croissanter 👏 🥐


CROISSANTDEIG
♥ 2,5 dl Vann
♥ 14 g Tørrgjær
♥ 500 g Hvetemel
♥ 12 g Salt
♥ 50 g Sukker
♥ 100 g Mykt smør i terninger

TIL KJEVLING
♥ 250 g Smør

Croissantdeig, dag 1 på kvelden
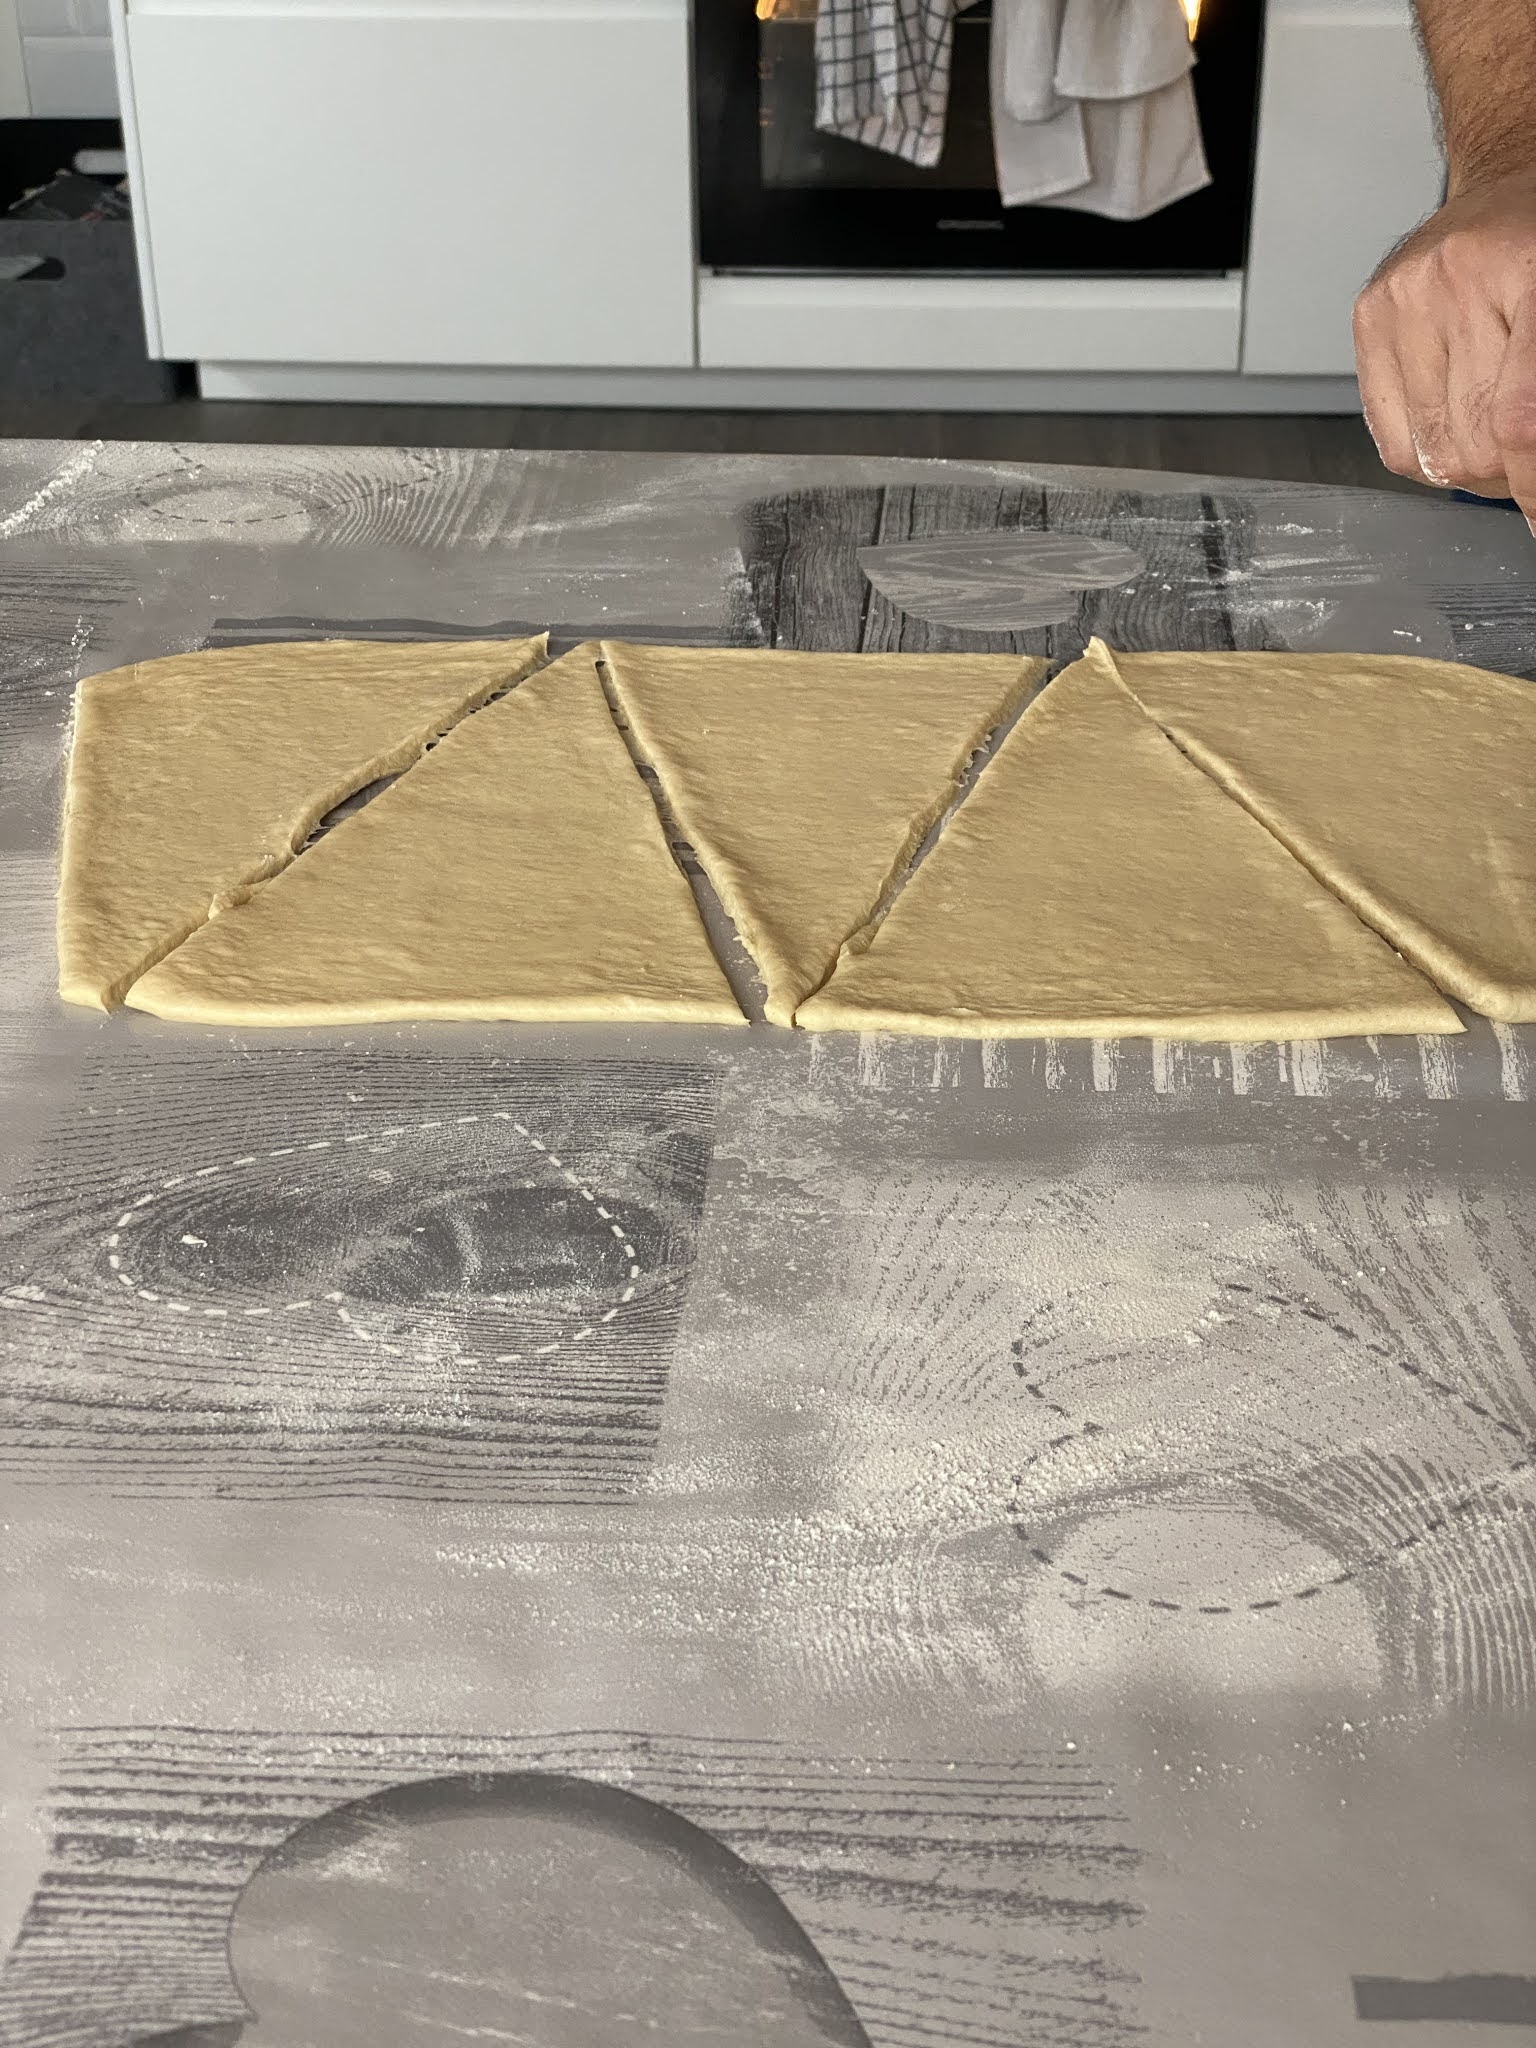
Varm vannet til det er lunkent ca. 25-30 grader. Ha vannet i en skål og rør inn gjæren. La stå i 5 minutter. I en stor kjøkkenmaskinbolle har du mel, salt, sukker og mykt meierismør. Bland det sammen med en k-visp slik at smøret fordeler seg i melet. Bytt til eltekrok. Tilsett vann og gjærblandingen og elt i ca. 7-8 minutter på lav/medium hastighet. Hell deigen ut på kjøkkenbenken uten å tilsette mer mel og kna deigen godt i noen minutter. Smør en bolle med litt smør og ha deigen over. Dekk med plastfolie og la deigen heve til dobbel størrelse. Tar ca. 2 timer.

Ha litt mel på kjøkkenbenken og bank deigen utover til en rektangel. Brett kortsidene over hverandre, så bretter du langsidene over hverandre. Pakk deigen inn i plastfolie og sett i kjøleskapet natten over. Ha det myke(250 g) smøret i en zip-pose som er ca. 18 x 20 cm stor. Kjelve smøret utover så du har en firkant. Sett smørblokken i fryseren natten over.


Dag nr. 2 på morgenen
Ta smørblokken ut av fryseren og la ligge på kjøkkenbenken i 45 minutter så det mykner litt. For å få smøret ut av posen så klipper du av sidene slik at du kan dra av plastikken. Når smøret har blitt litt mykere så tar du deigen ut av kjøleskapet. Poenget er av smør og deig skal ha lik konsistens. Ha litt mel på kjøkkenbenken og kjevle deigen ut til en rektangel som er 40×18 cm. Prøv å gjøre dette så jevnt og nøyaktig som mulig. Plasser smørblokken på den ene halvdelen og legg den andre deighalvdelen over. Du har nå lukket smørblokken inne. Nå ska du kjevle ut til en rektangel som er 60×20 cm. Kjevle fra midten og utover.

Fjern all ekstra mel og brett den ene kortsiden 2/3 inn og den andre kortsiden skal brettes mot den første. (se video på insta). Kjevle ut på nytt slik at du jevner ut deigen og bretteskjøtene ikke synes lenger. Brett deigen i to fra kortsiden.


Tusen takk for besøket og ha en strålende dag videre :-)

20. desember 2017

Mormor sine super gode sirupsnipper 💗

Disse jeg vokste jeg opp med og de var alltid så gode. Endelig fikk jeg oppskriften og endelig skulle jeg prøve om jeg klarte å gjenskap smaken av mormor sine sirupsnipper fra jeg var lita.

Det gjorde jeg, eller vi 😊 Det var Ole Jørgen som lagde deigen 👍

♥ 1/2 kg sirup, vi brukte mørk
♥ 175 g smør
♥ 1/4 l fløte
♥ 250 g sukker

Disse fire ingrediensene kokes opp og skal bli så og si helt kaldt før det tørre blandes inn.

ca.700 g hvetemel
♥ 1 ts ingefær
♥ 3 ts pepper
♥ 2 ts natron

Når det gjelder melet, så er det egentlig ca 500 g, men det var altfor lite, så Ole Jørgen måtte tilsette ganske mye for å få deigen fast nok. Viktig å bruke mel ved utkjevling også.

La deigen stå i kjøleskapet til neste dag!

Kjevles tynt og sett på en skoldet mandel.
Stekes på 200 grader i 5-8 minutter.

Vi lagde sirupshjerter 😍


Tusen takk for besøket og ha en strålende dag videre :-)

27. juli 2015

Italiensk pizza :-)

Vi skal jo pusse opp/bygge om i Halden og siden planleggingen av dette startet, så var en bakerovn/pizzaovn en del av planen. Da vi kom hjem fra Italia fikk vi høre om en kar i Halden som kunne skaffe en slik ovn, og vips så stod pizzaovnen på terrassen :-) Det er bare en feil med den, fargen er rød.....Jeg har bestemt meg for at jeg bare må leve med det ;-)

Han som skaffet oss bakerovnen heter Fred og han er opprinnelig baker. Han har bl.a drevet bakeriet Kringla som lå i Tistedal. Det er selskapet Stoneart AS i Larvik som importerer pizzaovnene fra Italia, men Fred som har demonstrasjon av disse. Uansett, av Fred fikk vi oppskrift på pizzadeigene som han bruker i disse bakerovnene og den kommer her :-)

♥ 1,5 kg pizzamel
♥ 35 gr salt
♥ 20 gr sukker
♥ 14 gr fersk gjær
♥ 9 dl kaldt vann
♥ 60 gr nøytral olje

Bruk litt av det kalde vannet til å løse opp gjæren. Bland sammen det alt det tørre sammen med vannet og elt i en mixmaster. Ha oljen i til slutt, når deigen har blitt eltet sammen.

Del opp deigen i 9 deler av ca 250 gram. La den stå i kjøleskap i minst 1 døgn, gjerne lengre. Ta ut deigen og la den stå i romtemperatur minst to timer før bruk.


Tusen takk for besøket og ha en strålende dag videre :-)

11. mars 2015

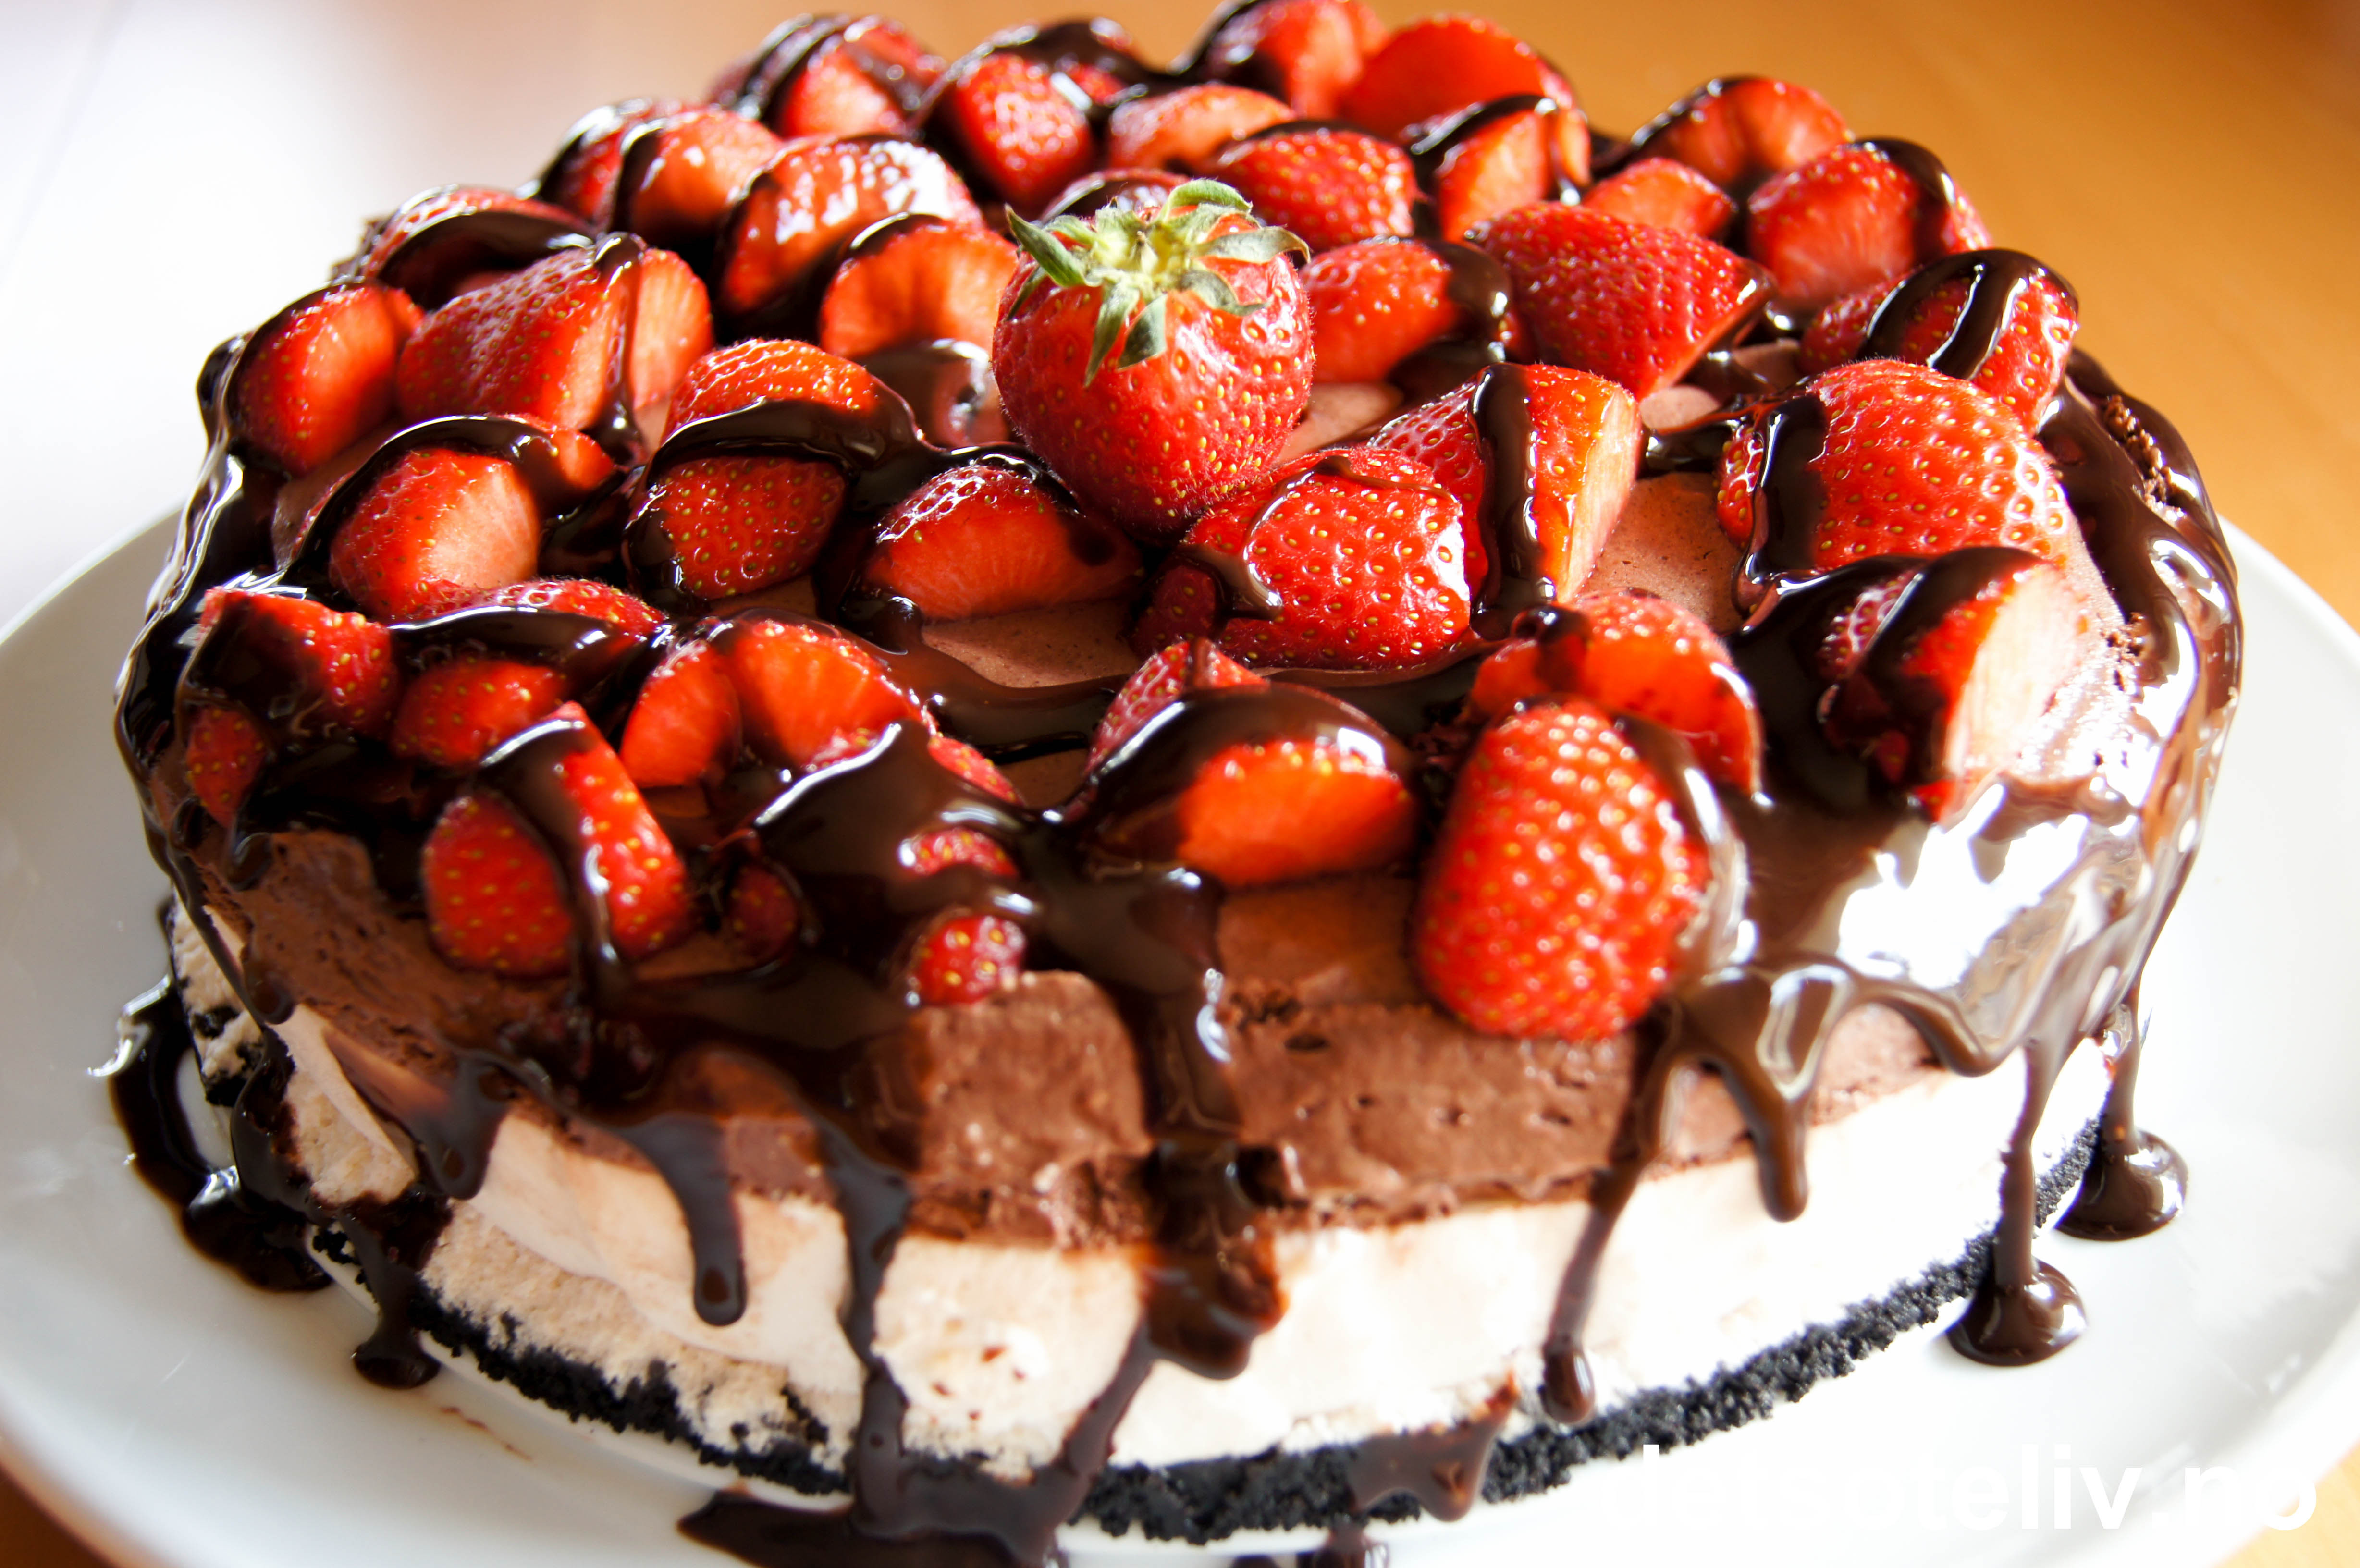
Oreo Dream Cake

Dette er en av de absolutt beste kakene jeg kan få og den har jeg fått hos min svigerinne Lill Heidi i mange år nå:-) Tilslutt spurte jeg etter oppskriften og den er hentet fra Det søte liv, en fantastisk nettside med mange fristelser :-)

Ingredienser
Bunn:
♥ 300 g Oreokjeks
♥ 100 g smør

Ha Oreokjeks i en food processor sammen med mykt smør. Kjør i full hastighet til en jevn masse. Ha en kakering til en rund form som er 24 cm i diameter direkte på et kakefat. Trykk kjeksmassen løst ned i bunnen og ut i kantene. Sett fatet med kakeringen i kjøleskapet i 30 min.

Fyll 1:
♥ 200 g kremost (1 pk Phildelfia)
♥ 2,5 dl melis
♥ 3 dl kremfløte
♥ 50 g Oreokjeks

Rør sammen kremost og melis. Pisk kremfløten til krem og vend inn i osteblandingen. Ha ca 2/3 av ostekremen over kjeksbunnen i kakeformen. Stikk grovt hakkede Oreokjeks ned i ostemassen. Sett i kjøleskapet i 30 min.

Fyll 2:
♥ 1 pk lys sjokolademousse (Toro)
♥ 3 dl melk
♥ 50 g Oreokjeks

Pisk sammen sjokolademoussepulveret og kald melk, som anvist på pakken. Ha sjokolademoussen over ostekremen i formen. Stikk grovt hakkede Oreokjeks ned i moussen. Sett kaken tilbake i kjøleskapet i 30 min.
Fordel resten av ostekremen over sjokolademoussen. 

Pynt med f.eks jordbær og sjokoladesaus, eventuelt luksusvarianter av Oreokjeks.

NYT :-)


Tusen takk for besøket og ha en strålende dag videre :-)

4. januar 2014

Eplekake med vaniljekrem

Bunn:
♥ 250 gr margarin
♥ 90 gr melis
♥ 250 gr hvetemel

Fyll:
♥ 1 pk vaniljesaus
♥ 3 dl melk
♥ 3 ss sukker
Dette kokes til saus

♥ 4 epler i skiver

2/3 av deigen legges i bunnen og litt oppover kantene i den smurte formen. Legg på epleskiver og ha over vaniljesausen. Dekk til med resten av deigen som er kjevlet ut til et tynt lokk (stikkes med gaffel)
Stekes ved 180 grader i ca 55 minutter. Strø melis over kaken før servering.


Tusen takk for besøket og ha en strålende dag videre :-)

13. januar 2013

Farmor´s rundstykker

♥ 1 kg hvetemel
♥ 4 dl melk
♥ 3 dl vann
♥ 50 gr gjær
♥ 100 gr smør (smuldre sammen med melet)
♥ 1 ts salt
♥ 1 ss sukker

Stekes på 225 grader

Tusen takk for besøket og ha en strålende dag videre :-)

Gulrot kake

4 egg og 3 dl sukker blandes til eggedosis.

2 ts natron
1 ts salt
1 ts vaniljesukker
2 ts kanel
2 dl mel
blandes i eggedosisen

1 1/2 dl nøytral olje og 4-5 dl revet gulrøtter blandes i tilslutt.

Kaken stekes på 190 grader i ca 50 minutter midt i ovnen.

Glasur:
100 gr philadelfia ost
50 gr smør
125 gr melis
1 ts vaniljesukker
Tusen takk for besøket og ha en strålende dag videre :-)